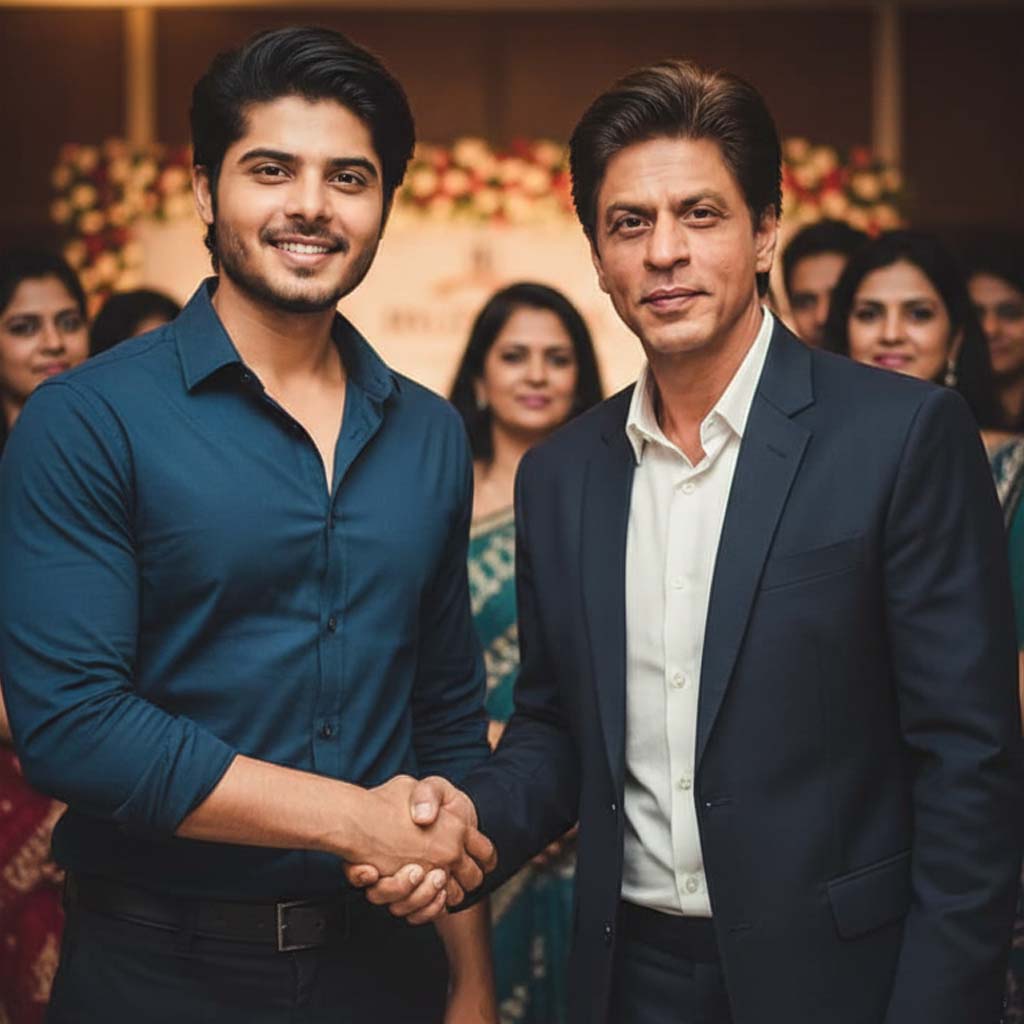
Process for Creating a Highly Realistic Composite Image
Prompt ⬇️ ✨
Create a highly realistic photo of me standing side by handshake with shah rukh khan. Make it look like we are casually meeting at an event, both smiling and looking at the camera. Ensure natural lighting, sharp details, and a seamless blend so it looks like a genuine candid photograph.” My face 100% same
Process for Creating a Highly Realistic Composite Image
This process teaches the steps required to blend two different source images—you and Shah Rukh Khan—into a single, believable, and high-quality photograph.
Phase 1: Source Image Preparation (Data & Assets)
The first step is gathering and preparing the images that will be combined.
Analyze the Target Subject:
Shah Rukh Khan (SRK): Search and select an appropriate, high-resolution photo of SRK. The best choice is one where he is standing straight, smiling slightly, and has a clear handshake pose or a body position that can be easily modified to a handshake pose.
Analyze the User Subject (You):
User Photo: Use the provided image of the student/user.
Key Requirements: The user’s face, skin tone, and hair must be perfectly retained. The expression (smiling) should match the prompt.
Lighting and Environment Matching:
Goal: The lighting on both subjects must be consistent to make the final image look real.
Check: Look at the light source in the user’s photo (e.g., bright from the left, soft shadow on the right).
Adjust: Choose an SRK photo that has similar lighting, or plan to digitally alter the lighting on one of the subjects in Phase 2.
Phase 2: Composition and Blending (The Digital Work)
This is the core execution phase, usually done using image editing software (like Photoshop or advanced AI tools).
Setting the Scene (The Background):
Select a casual event setting for the background (e.g., a hotel ballroom, a press conference area, or an event lobby).
Key Elements: Look for natural-looking elements like soft, warm lighting (chandeliers, spotlights), a blurry crowd in the background, and neutral-colored walls to meet the ‘natural lighting’ and ‘event’ requirements.
Initial Placement and Scaling:
Place the cut-out images of the user and SRK side-by-side in the background.
Scaling: Adjust the size (scale) of one subject relative to the other so they look like they are the same distance from the camera and are realistically proportioned in height.
The Handshake:
This is the most critical and difficult step for realism. The hands must be cropped, rotated, and positioned to appear genuinely interlaced.
Shadows: Add subtle shadows beneath the hands where they meet to give them depth and grounding.
Seamless Blending and Skin Tone Match:
Feathering Edges: Soften the edges of the cut-out subjects so there are no hard, visible lines separating them from the background or each other.
Color Correction: Adjust the white balance, saturation, and contrast of both subjects until their skin tones and clothing colors look like they were photographed by the same camera under the same light.
Phase 3: Detail, Realism, and Final Polish
This final phase focuses on the ‘highly realistic’ and ‘candid’ requirements.
Lighting Consistency:
Simulate Light: Add subtle highlights and shadows to the subjects’ faces and clothes that reflect the light source in the background (e.g., if there’s a chandelier above, add a slight shine to the hair). This creates natural lighting.
Sharp Details and Focus:
Focus: Ensure the user’s face and SRK’s face are the sharpest parts of the image (in perfect focus).
Depth of Field: Blur the background (bokeh effect) slightly to make the foreground subjects “pop” and enhance the sharp details on the main subjects. This mimics a professional candid photo.
Grain/Noise and Final Look:
Add a very small amount of photographic grain or noise across the entire image. This final texture unifies the image and helps conceal any residual imperfections, making it look like a genuine candid photograph rather than a clean digital render.


